What the seated row does and who it is for
The chest-supported seated row machine is the cornerstone horizontal pulling station found in Planet Fitness, Crunch Fitness, Anytime Fitness, and LA Fitness. While bent-over barbell rows and unsupported cable rows place substantial isometric fatigue on the lumbar erectors and hamstrings just to hold your torso in space, the seated row machine uses a vertical padded chest bolster. Bracing your sternum against that pad eliminates lower-back shear and lets you focus 100% of your neural drive on scapular retraction and horizontal shoulder extension.
Mechanically, pulling the handles toward your ribcage trains the rhomboids, middle and lower trapezius, posterior deltoids, and latissimus dorsi in unison. This muscular chain thickens the upper back and actively pulls rounded shoulders back into healthy postural alignment, making it essential for anyone who works at a computer or drives for hours each day.
In Gym.Coach, which supports 95% of commercial strength equipment across major and boutique brands and selects 5 balanced machines every workout, the seated row acts as the direct structural counterbalance to the seated chest press and pec fly.
In American fitness centers including Planet Fitness, Crunch Fitness, LA Fitness, Anytime Fitness US, and 24 Hour Fitness, you will find this station from brands like Matrix, Technogym, Life Fitness, or Gym80. Our US program uses color-coded seat settings so you can customize your setup in seconds, recruit maximum muscle fibers around the joint center, and progress in +5 lbs increments (from 65 lbs for men and 45 lbs for women up to 100 to 120 lbs lbs over 12 weeks).
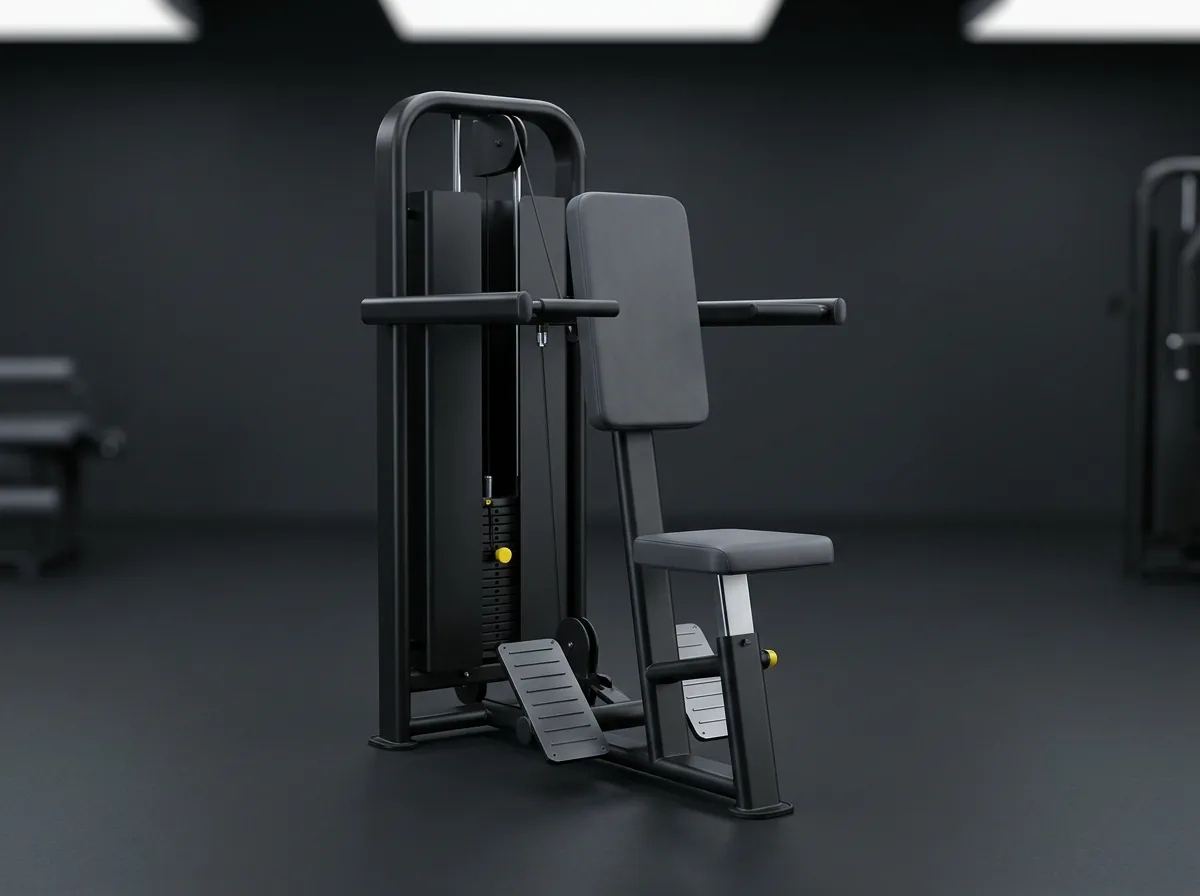
How do you set up the seated row in 20 seconds?
- 1. Adjust the Seat Height So the Chest Pad Meets Your Mid-Sternum Pull the seat adjustment pin and raise or lower the saddle until the top edge of the vertical chest pad sits just below your collarbones, supporting your full breastbone without pressing into your throat.
- 2. Set the Chest Pad Depth for Full Arm Reach Adjust the horizontal telescoping pin on the chest pad so that when your chest is pressed firmly against the upholstery, your fingertips can just grasp the handles with your elbows fully extended and your shoulder blades slightly protracted.
- 3. Select Your Weight and Choose Neutral or Pronated Handles Insert the weight pin at 65 lbs for men or 45 lbs for women. Grasp the vertical neutral handles (palms facing each other) to bias the lats and mid-back, or the horizontal overhand handles to bias the rear deltoids and upper-back thickness.
- 4. Plant Your Feet and Brace Your Sternum Against the Pad Place both feet flat on the machine footrests or the floor to stabilize your pelvis. Press your breastbone firmly into the pad and keep your neck neutral with your chin slightly tucked.
- 5. Drop Your Shoulders Away from Your Ears Before initiating the pull, let the weight gently draw your shoulder blades forward into a clean pre-stretch while keeping your upper traps relaxed and down.
Log both your seat height number and chest pad depth notch in Gym.Coach for instant repeatable setup.
Execution: tempo, breathing, range of motion
- Concentric Phase: 1 Second Row (Exhale) Exhale forcefully and initiate the movement by gliding your shoulder blades together toward your spine, followed immediately by driving your elbows straight back past your ribs over 1 smooth second.
- Isometric Peak Contraction: 1 Second Hold Pause at peak contraction for 1 full second with your elbows drawn behind your torso and your shoulder blades pinched together as if crushing a walnut between them. Keep your sternum glued to the chest pad.
- Eccentric Return Phase: 3 Seconds Lowering (Inhale) Inhale steadily through your nose while extending your arms forward over a strict 3-second count. At the end of the reach, allow your shoulder blades to glide apart around your ribcage before reversing 1 centimeter above the weight stack.
Perform 3 working sets of 8 to 12 repetitions with a 90-second rest period between sets. (1-1-3 tempo / 90s).
The 5 mistakes you see every day on the seated row
- 1. Peeling the Chest Off the Pad to Use Momentum Pushing with your legs to rock your chest backward off the bolster turns a strict upper-back row into a lower-back extension swing. Keep your breastbone pressed into the upholstery from start to finish.
- 2. Curling the Wrists Inward as the Weight Gets Heavy Flexing your wrists toward your forearms recruits the wrist flexors and steals tension from your back. Keep your wrists completely flat and imagine pulling from the backs of your elbows.
- 3. Shrugging the Shoulders Up Toward the Neck Elevating the scapulae during the row shifts the workload onto the upper trapezius and levator scapulae, often causing neck stiffness. Drive your elbows low along your lower ribs.
- 4. Cutting the Eccentric Stretch Short Keeping your shoulder blades permanently pinched together and only moving your forearms reduces upper-back hypertrophy. Let your scapulae protract cleanly under control at the end of every 3-second lowering phase.
- 5. Hyperextending the Neck to Look Up at the Ceiling Cranking your chin upward compresses the cervical spine under load. Keep your gaze directed straight ahead at the front of the machine frame.
Which starting weight should you choose and how do you progress?
Beginners training at Planet Fitness or Crunch Fitness should start at 65 lbs (men) or 45 lbs (women). Use double progression: keep the weight fixed until you complete 3 sets of 12 reps with a full 1-second scapular squeeze at the back and a 3-second eccentric return, then increase by 5 lbs or 10 lbs. After 12 weeks, average lifters reach 100-120 lbs (men) and 65-85 lbs (women).
Double Progression Table (US Imperial LBS):
| Session | Sets x Reps (1-1-3 Tempo) | Weight (LBS) |
|---|---|---|
| Session 1 | 3x10 | 65 lbs (F: 45 lbs) |
| Session 2 | 3x11 | 65 lbs (F: 45 lbs) |
| Session 3 | 3x12 | 65 lbs (F: 45 lbs) |
| Session 4 | 3x10 | 70 lbs (+5 lbs step) |
If your elbows cannot travel behind the line of your torso on the final reps, stay at the current weight for one more session.
How does the seated row differ by brand?
| Machine Brand & Series | Chest Pad & Handle Configuration | Mechanical Path & Practical Note |
|---|---|---|
| Matrix Ultra / Versa Series (common in Planet Fitness and Anytime Fitness) | Ratcheting seat post with a spring-loaded telescoping chest pad and rotating dual-position grips. | Diverging independent arms widen slightly as you pull back, allowing fuller scapular retraction around the ribcage. |
| Technogym Selection Pro / Artis (common in Anytime Fitness and LA Fitness) | Yellow-flagged seat and chest pad levers with multi-angle horizontal and vertical cross-handles. | Overhead pivot point creates a slight downward-and-back arc that keeps tension off the upper traps. |
| Life Fitness Insignia / Signature / Insignia Series (common in Crunch Fitness and LA Fitness) | Numbered pull-pin chest pad column with closely spaced vertical and angled wide grips. | Independent arms allow both bilateral and single-arm alternating rows to fix left-to-right strength imbalances. |
| Gym80 Sygnum & Hammer Strength Select (24 Hour Fitness, Crunch, performance clubs) | Heavy-duty steel ratcheting seat pin with laser-etched position numbers | Direct mechanical cam profile; use the +5 lbs drop-down add-on weight when stepping up after 3x12. |
Frequently asked questions
Should I use the vertical neutral handles or the horizontal wide handles?
Use the vertical (neutral) handles when you want to target your lats and overall back sweep with a comfortable shoulder position. Use the horizontal (pronated) handles when you want to focus on upper-back thickness, rhomboids, and rear deltoids.
Is it okay to let my shoulders stretch forward at the end of the lowering phase?
Yes, as long as your sternum stays pressed against the chest pad. Allowing your shoulder blades to protract forward under control stretches the rhomboids and middle traps under load, which is a powerful stimulus for muscle growth.
How does the chest-supported seated row compare to the low-pulley cable row?
A low-pulley cable row requires your lower back and hamstrings to hold your torso upright against the cable pull. The chest-supported seated row removes lower-back fatigue completely, making it safer and more effective for isolating the upper back.
How does Gym.Coach schedule the seated row in my training plan?
Gym.Coach supports 95% of commercial strength equipment and picks 5 balanced machines each session. It ensures every horizontal push is matched with a horizontal pull like the seated row so your shoulders stay healthy and upright.